
Peanut Butter Silk Pie
It’s official. Between work and summer school, life has become busy again. Which means my baking life has had to slow down. Good news, though! Only 2 weeks left of class and then I am free to return to the comforts of my kitchen with my trusty mixer, shiny oven, and gallon-sized container of sugar.
In the meantime, I actually was able to grab a spare moment to whip up this pie which is like a French silk pie made with peanut butter instead of chocolate because, as we all know, peanut butter is the food of college kids.
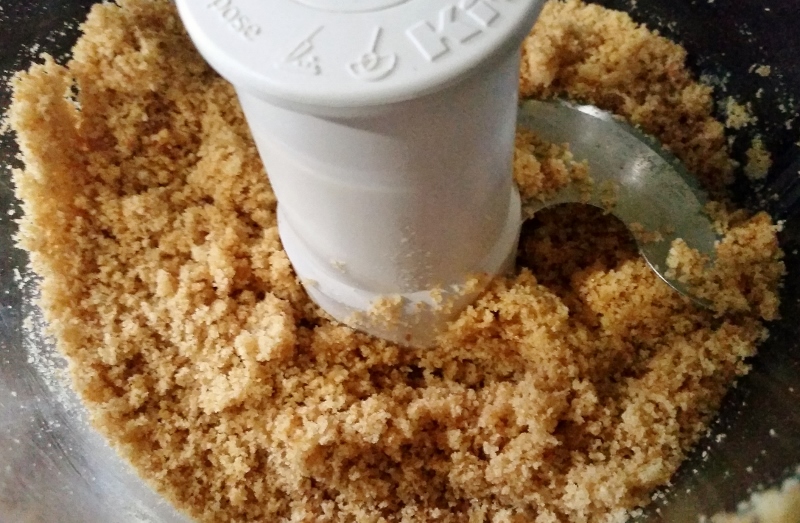
Start with my favorite vanilla cookie crust! Or don’t listen to me and just use whatever crust you want. But this is a good one, pinky promise! Grind up exactly 46 vanilla wafers in a food processor, then pour in 3 tablespoons of sugar, some melted butter, and some salt and process again until the crumbs are all buttery and what not.
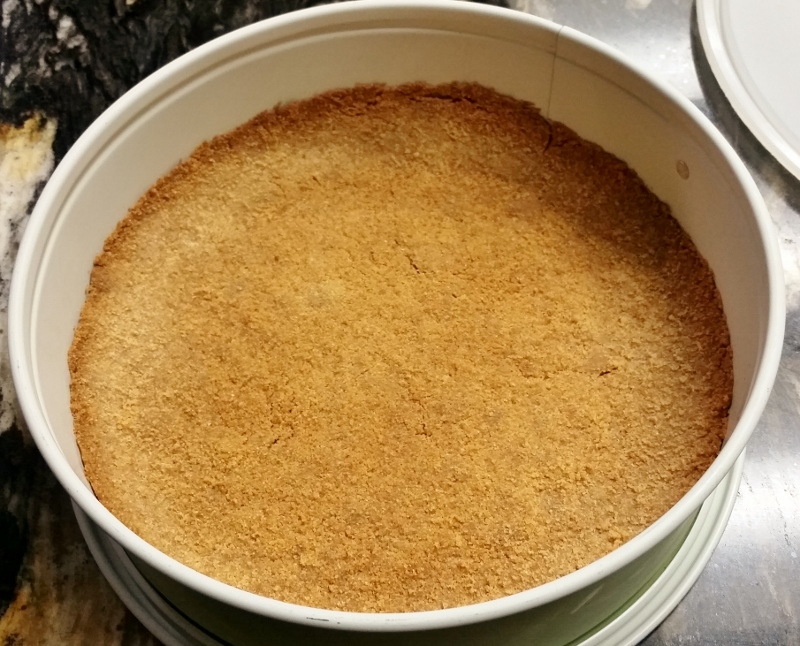
Press them into the bottom and up the sides of a springform pan and bake at 350 for exactly 12 minutes. I’m beginning to realize how exact of a recipe this is.
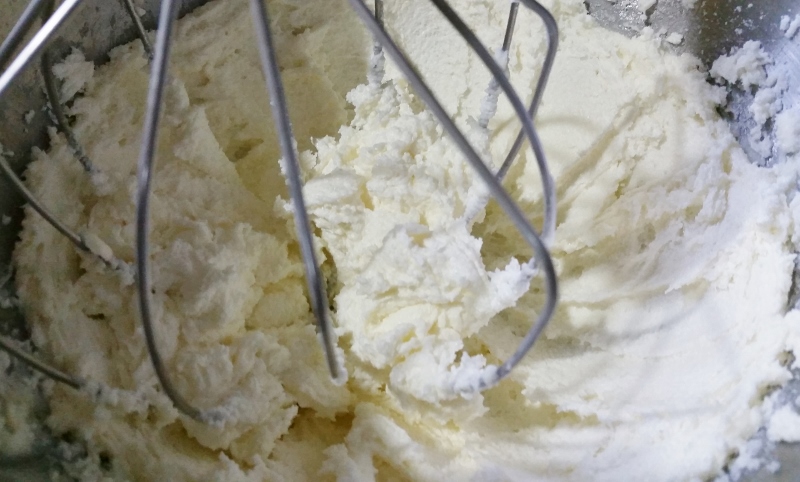 To make the filling, cream together a cup of butter with a cup and o’ half of sugar.
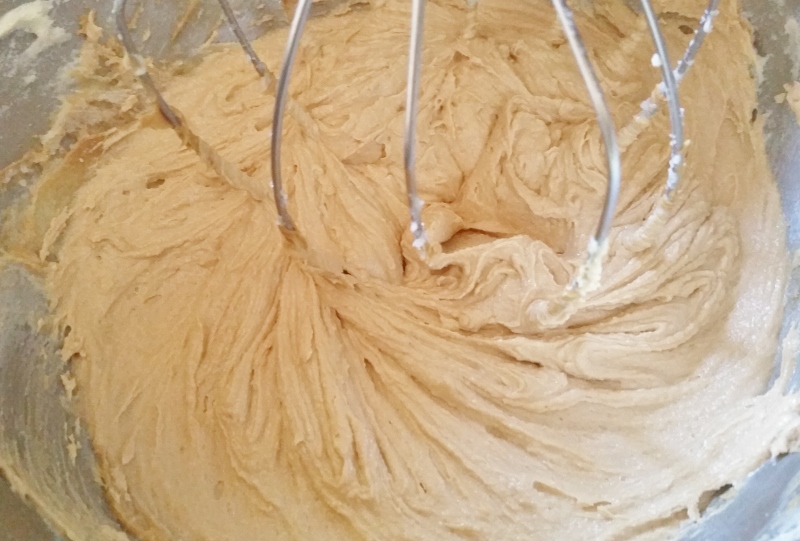
Toss in a cup of smooth peanut butter and cream again, scraping down the bowl once to make sure it all gets incorporated. Think they’ll ever invent self-scraping mixer bowls?
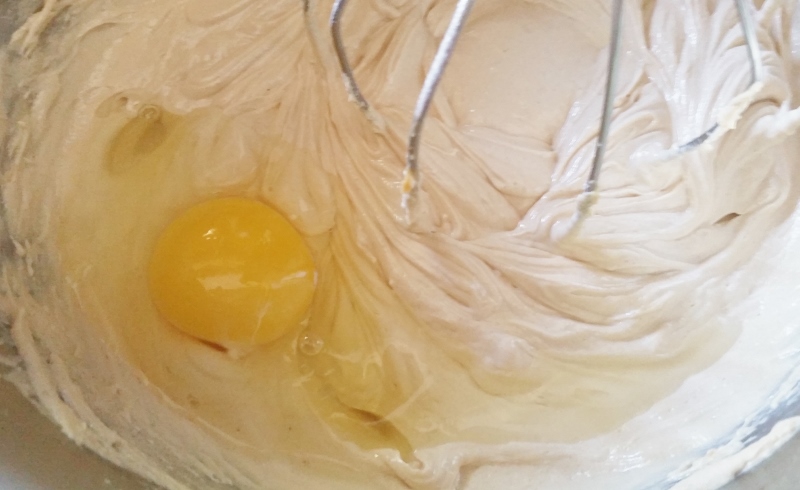
Now, for the next 20 minutes, you’ll be egg crackin’ and mixing. Toss in an egg and then mix on medium speed for 5 minutes, then plop in another one, and mix for another 5 minutes. At the end, you’ll have used 4 eggs. That’s called math.
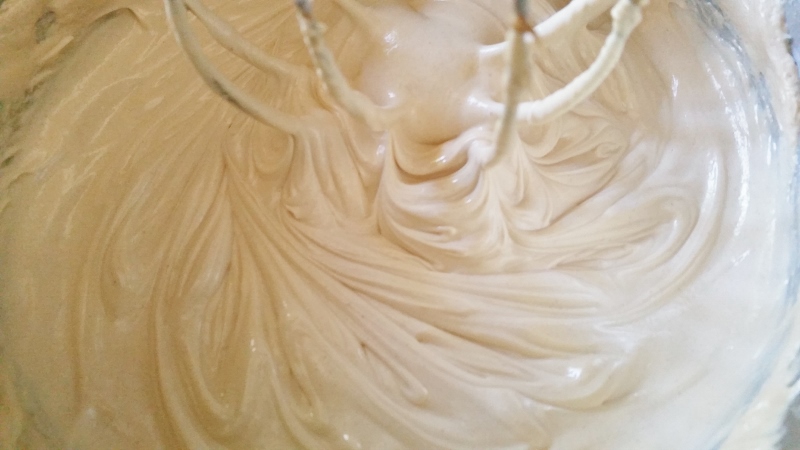 In the end, you’ll have a thick, glossy filling (the silk part, ladies and gentlemen!) that demands to be poured into a pie crust.
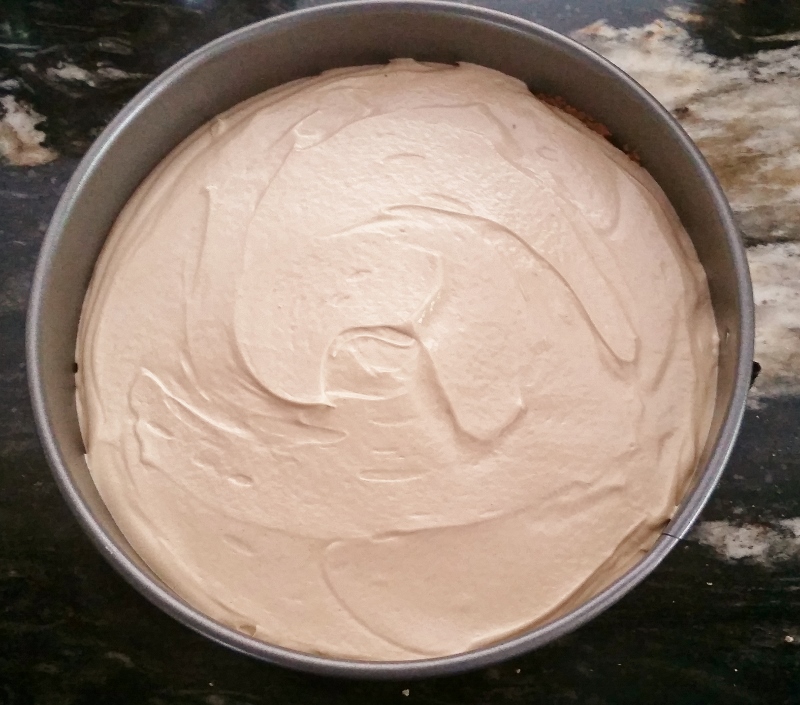
So pour it into the pie crust! And then stick it in the fridge and let it chill for at least 3 hours so it can firm up a bit for cutting and neatness purposes.
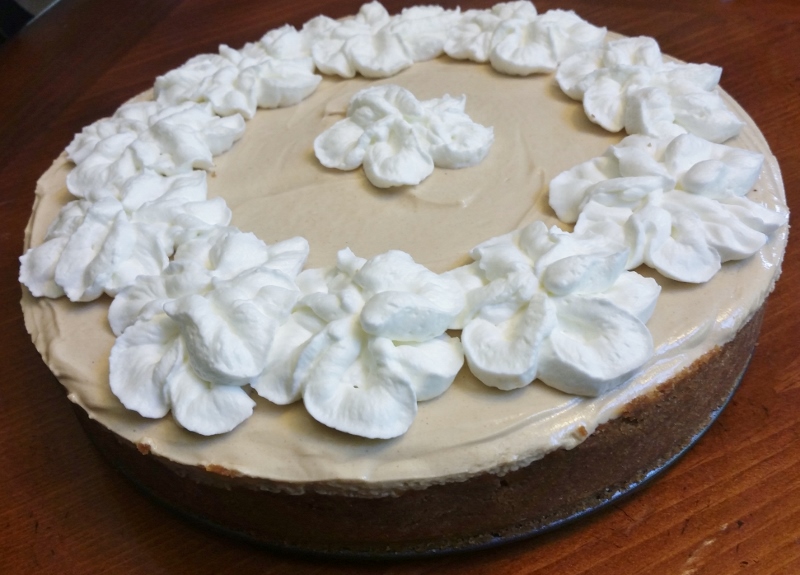
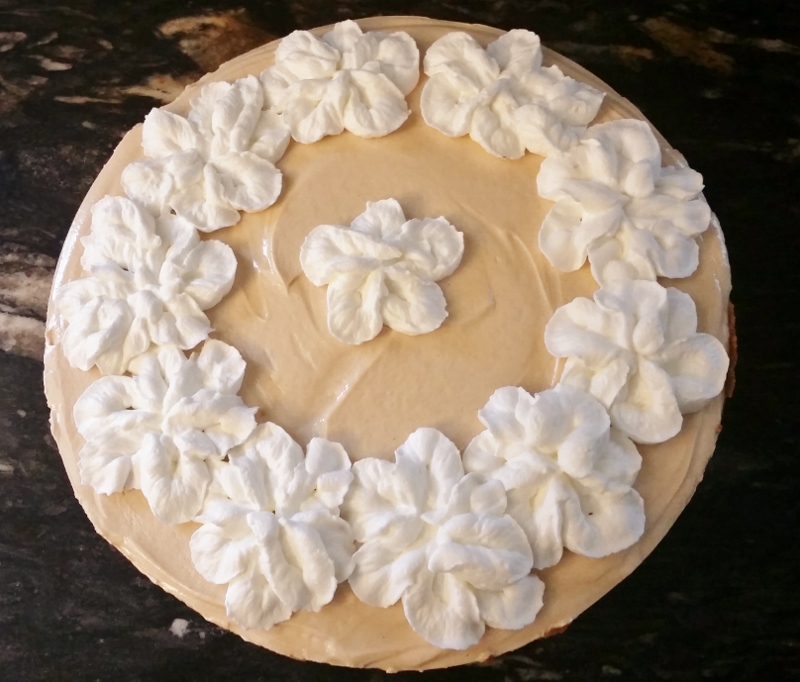
When it’s all firmed and what not, take it out of the springform pan and decorate it with some whipped cream if that’s how you’re feeling. Or plop a big glob right in the middle if that’s how you’re feeling. Or don’t use whipped cream at all if that’s how you’re feeling because baking is a free country.
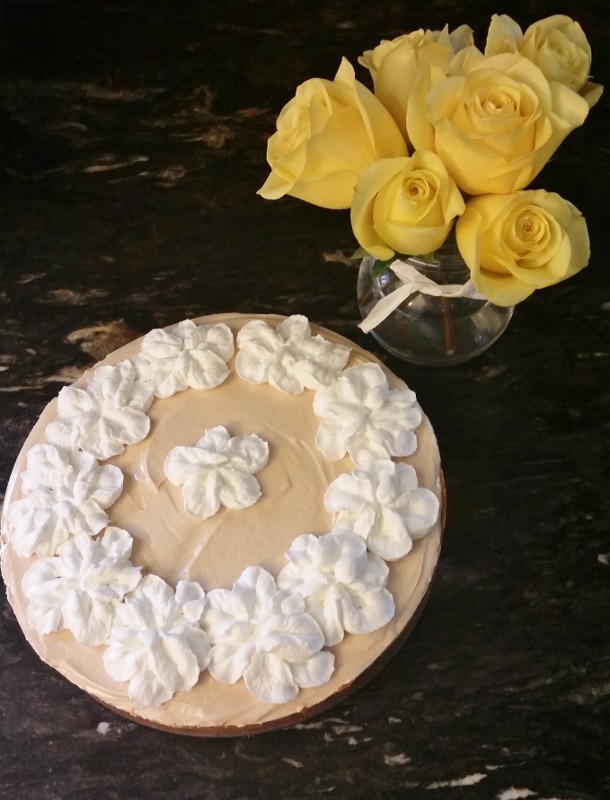 Don’t my whipped cream flowers look nice next to real flowers? Which would you prefer to have?
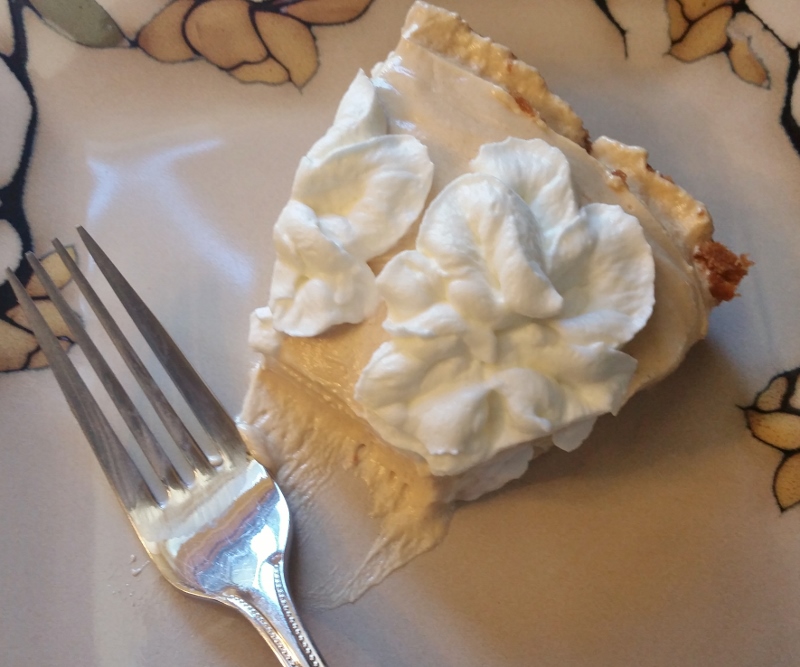 Anyway, this creamy pie is a peanut butter lover’s dream. It is luscious and very easy to make and makes for an amazing comfort food. Honestly, I haven’t been able to find anything that peanut butter doesn’t go well with. I had peanut butter on a burger a few weeks ago and it was a really nice experience. Thank you for letting me share this with you.
Peanut Butter Silk Pie
Source: crust recipe from Martha Stewart’s Cakes
Yield: One 9-inch pie
Crust:
46 vanilla wafer cookies
3 tablespoons granulated sugar
5 tablespoons butter, melted
1/4 teaspoon salt
Preheat the oven to 350 degrees F. Place the wafer cookies in the bowl of a food processor and process until finely ground. Add the sugar, butter, and salt and process again until combined. Press into the bottom and up the sides of a 9-inch springform pan. Bake for 12 minutes until golden brown and set. Let cool completely.
Filling:
1 cup (2 sticks) salted butter, at room temperature
1-1/2 cups granulated sugar
1 cup smooth peanut butter
1 teaspoon vanilla extract
4 eggs
In a large bowl with an electric mixer fitted with a whisk attachment, beat the butter and sugar together until fluffy, about 1 to 2 minutes. Add the peanut butter and vanilla extract. Beat the mixture thoroughly until combined.
Turn your mixer to a medium speed and, over a period of 20 minutes, add in the four eggs, one at a time, leaving about 5 minutes between each egg addition. Once the pie filling is well mixed, pour it into the baked pie crust. Smooth out the pie filling and place pie in the refrigerator to chill for at least three hours (preferably longer). Top with prepared whipped cream, if desired.
Kelcie Kromminga
Hi! I'm Kelcie and I've got a major passion for dessert! I started this blog to help share my love for crafting sweet, beautiful, and crazy-delicious treats. I find baking to be an outlet for my creative side that just so happens to also satisfy the unstoppable sweet tooth with which I was born (I get that from my dad's side). The recipes I create are designed to be easy, yet produce that impressive "Wow!" and "Yum!" factor. When I'm not baking, you'll probably find me either reading, writing, gardening, or spending way too much time on Pinterest. I hope my recipes will help you find your own inner merriment for all things fun, beautiful, and (of course) sweet!